A faucet dripping from the handle is more than a small kitchen annoyance. It can indicate a worn cartridge, damaged O-ring, loose packing nut, or excessive water pressure. The visible water may appear around the handle base, while the failed seal sits underneath. So, what causes a faucet to drip from the handle? The answer depends on the faucet design, service age, installation quality, and leak timing.
The U.S. Environmental Protection Agency’s WaterSense program reports that household leaks can waste nearly 10,000 gallons of water annually. Its leak guidance also notes that 10% of homes have leaks wasting 90 gallons or more each day. These figures include many plumbing fixtures, not only faucets. Still, they show why a slow handle leak deserves attention. A single drop can stain the escutcheon, soften a cabinet, or leave mineral crust around the stem. It may also worsen quietly overnight. That is the frustrating part.
This guide examines the main causes behind handle leaks, including worn ceramic cartridges, deteriorated rubber seals, loose retaining hardware, and incorrect assembly. It also connects practical inspection steps with manufacturer service principles and EPA water-efficiency guidance. A careful homeowner may find a simple repair, but not every drip has the same source. Sometimes the handle is blamed unfairly. The spout, valve body, or supply connection may be leaking instead. That possibility is easy to miss. For reliable results, shut off the water, identify the faucet model, and inspect each sealing point before replacing parts.
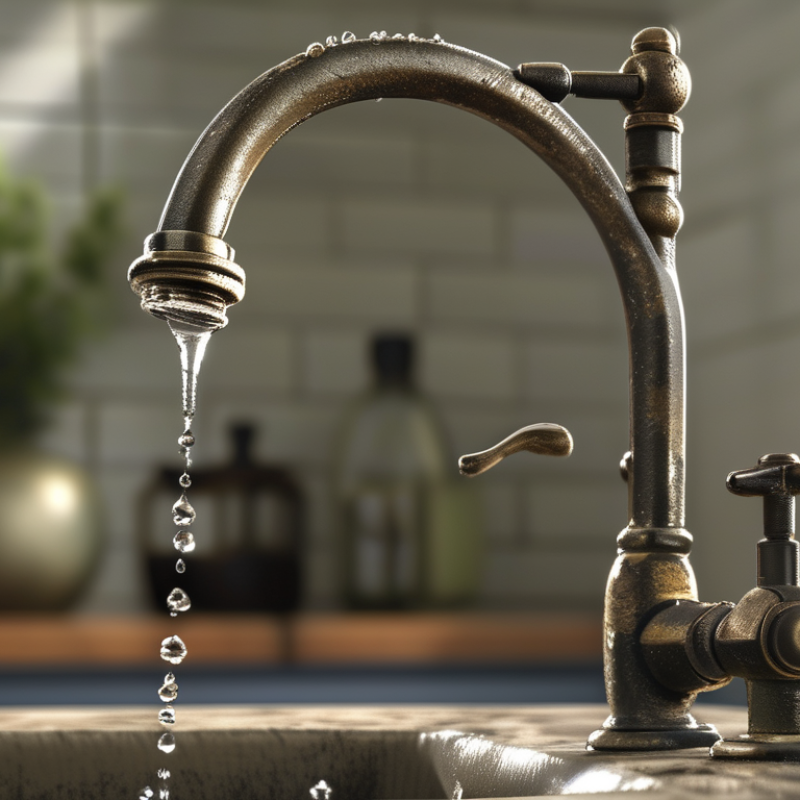
A faucet dripping from the handle usually indicates a failed internal seal, not a problem with the spout. In a single-handle faucet, the cartridge or its O-rings may be worn, cracked, or coated with mineral deposits. In a two-handle faucet, the stem seal or packing nut often deserves inspection. Water may travel along the handle stem, making the leak appear smaller than it really is.
Look closely. Is the handle wet after use, or does water appear when the faucet is closed? A loose handle can allow movement and damage the valve seal. Corrosion can also create a rough surface that prevents a tight seal. In field repairs, the first diagnosis is not always correct. Wiping the area dry and checking it again after several minutes often reveals the leak path.
The waste can become measurable. The U.S. Geological Survey reports that one drip per second may waste more than 3,000 gallons of water yearly. EPA WaterSense also estimates household leaks can waste nearly 10,000 gallons annually. These figures depend on pressure and drip size, but they show why a handle leak deserves attention. Shut off the water before removing the handle, and photograph the assembly first. Small parts are easy to misplace. If the valve body is corroded or the leak continues after seal replacement, a licensed plumbing professional should assess it.
A drip around a faucet handle often points to a problem beneath the decorative cap. The leak may appear only when water runs, making diagnosis easy to miss. I have found three causes repeatedly: a worn cartridge, a damaged O-ring, or a loose packing nut. These parts control water inside the valve body.
A worn cartridge can let water travel upward along the stem. It then escapes at the handle base and leaves a narrow wet ring. An O-ring may flatten with age, especially after frequent hot-water use. Mineral deposits can scratch sealing surfaces or stop the handle from sitting squarely. Hard water is often the quiet contributor.
A loose packing nut is simpler, but tightening it too much can make the handle stiff. Turn off the supply valves, remove the handle carefully, and dry the area completely. Then watch for the first bead of water. That detail matters. If the bead forms around the stem, inspect the cartridge or O-ring. If it appears below the valve body, the leak may involve a gasket or connection instead. I once blamed a bad cartridge when a loose connection caused the drip. That mistake wasted time, so I now check the water’s exact starting point first. A small flashlight and dry paper towel reveal more than guesswork. Persistent leaking deserves a qualified plumber’s assessment, particularly when shutoff valves also seep.
A faucet dripping from the handle usually points to an internal seal problem, not the spout. Dry the faucet completely, then wrap a small strip of tissue around the handle base. Open and close the faucet slowly. If the tissue becomes wet immediately, water is escaping around the stem or cartridge. A loose packing nut, worn O-ring, cracked cartridge, or damaged ceramic seal may be responsible. The exact cause varies by faucet design.
Turn off the supply valves before removing anything. If the drip stops when the handle is closed firmly, inspect the cartridge or valve stem first. If water appears only while turning the handle, suspect the stem seal or packing area. Do not overtighten the handle. That can damage threads and make diagnosis harder. A pressure gauge can also help; unusually high household pressure may worsen small leaks, although it is not always the original cause.
The U.S. Environmental Protection Agency’s WaterSense program reports that household leaks can waste nearly 10,000 gallons of water yearly. It also notes that ten percent of homes have leaks wasting at least 90 gallons daily. A handle drip may look minor, but the meter can reveal otherwise. In my repair experience, a dry tissue test is more reliable than guessing by sound. I once replaced a cartridge too quickly. The real fault was a loose retaining nut. Check the simplest connection first.
| Likely Cause | Typical Faucet Type | Visible or Physical Clues | How to Confirm the Source | Common Corrective Action | Priority |
|---|---|---|---|---|---|
| Worn cartridge | Single-handle faucet | Water appears around the handle stem, handle movement feels loose, or the faucet continues to drip after shutoff. | Dry the faucet, place a tissue around the handle base, and operate the handle. Water appearing at the stem indicates a cartridge or seal problem. | Shut off the water supply, remove the handle, and replace the cartridge or its compatible seals. | High |
| Damaged O-ring | Single-handle and pull-out faucets | A thin ring of water forms around the handle or spout base. The leak may worsen when the handle is turned. | Dry the area completely and move the handle through its normal range. A leak that follows the rotating or sliding stem often points to an O-ring. | Disassemble the handle or spout as appropriate and replace the damaged O-ring with the correct size and material. | Medium |
| Loose handle or retaining nut | Most faucet designs | The handle wobbles, and water leaks only while the faucet is operating or when the handle is moved. | Check for handle movement by gently holding the faucet body and moving the handle. Inspect the visible retaining screw or nut. | Tighten the handle screw or retaining nut carefully. Avoid excessive force, which can damage the finish or internal parts. | Low |
| Worn valve stem seal | Two-handle compression or stem faucets | Water leaks around one handle, especially when the handle is turned. The affected handle may feel stiff or uneven. | Turn on one handle at a time and observe which handle produces water at its stem. A dry paper towel helps reveal a small leak. | Replace the packing, stem seal, or complete valve stem if the stem is worn or corroded. | High |
| Failed ceramic-disc seal | Single-handle or two-handle disc faucets | Handle-area moisture may be accompanied by a stiff handle, inconsistent temperature control, or dripping from the spout. | Check both the handle base and spout after the supply is turned on. If both locations leak, the disc cartridge or internal seals may be damaged. | Clean the valve assembly if debris is suspected; replace the cartridge or disc seals if leakage continues. | High |
| Corroded or scratched valve stem | Older stem-style faucets | A new seal does not stop the leak, or the stem has visible pitting, rust, mineral buildup, or rough surfaces. | After removing the handle and seal, inspect the stem surface. A rough stem can quickly damage a replacement seal. | Replace the damaged stem or valve assembly rather than relying on another seal replacement. | High |
| Mineral buildup or debris | Any faucet, especially in hard-water areas | Handle movement is stiff, the leak is intermittent, or white, chalky deposits are visible near the handle base. | Inspect the handle, cartridge area, and seals for scale. Irregular operation after recent plumbing work may indicate trapped debris. | Clean removable parts and flush the supply lines. Replace seals or cartridges damaged by deposits. | Medium |
| Cracked faucet body or housing | Any faucet | Water emerges from a fixed crack, the leak remains after seals are replaced, or moisture appears below the handle assembly. | Dry the faucet and inspect it while pressurized. Use a flashlight to distinguish a body crack from water tracking upward from the supply connection. | Replace the damaged faucet body or complete faucet assembly. Sealants are not a reliable repair for a pressurized crack. | High |
| Water tracking from a nearby connection | Any faucet | The handle appears wet, but the actual leak begins at the spout base, supply connection, escutcheon, or countertop opening. | Dry all surfaces, then wrap separate areas with tissue. The first wet tissue identifies the point where water starts. | Repair the original source, such as a loose connection or worn spout seal, instead of replacing the handle parts. | Medium |
Safety note: Before removing a handle or cartridge, close the hot and cold shutoff valves or the main water supply. Open the faucet briefly to release pressure, and keep small parts organized during disassembly.
A faucet dripping from the handle usually points to a worn cartridge, stem seal, or packing nut. Water may also travel from the spout and appear near the handle, so locate the highest wet point carefully. Place a dry tissue around the handle base and faucet body. Watch where the first dark spot forms.
Before repairing anything, clear the sink and close both supply valves beneath it. Open the faucet briefly to release pressure. Keep a towel nearby; trapped water often escapes unexpectedly. Remove the handle cover or set screw gently, using the correct screwdriver or hex key. Photograph each part before removal. This small step prevents confusion later.
Check whether the handle feels loose, stiff, or gritty. A loose retaining nut can cause leakage, but overtightening may damage the stem. Inspect the cartridge or valve stem for scratches, mineral buildup, and flattened rubber seals. Clean light deposits with a soft cloth, not a sharp tool. I have sometimes blamed the washer too quickly; a cracked valve body or damaged seat can create similar symptoms. If the leak continues after a new seal, stop and inspect the valve housing. Do not force corroded parts. Shut off the main water supply if either local valve fails, then seek a qualified plumber for safe replacement.
A faucet leaking from the handle usually has a worn O-ring, cartridge, stem, or packing nut. Mineral buildup can also damage sealing surfaces. Turn off the shutoff valves before removing the handle. Place a towel over the drain. Small screws disappear quickly.
Replace a simple washer or O-ring when the faucet design is familiar and the leak source is visible. Use the old part as a size reference. A cartridge may need replacement when the handle feels stiff, wobbles, or leaks during operation. Do not force a corroded screw. I have found that rushing this step often creates a larger repair.
Call a licensed plumber when the shutoff valve will not close, the handle is seized, or water leaks beneath the counter. Professional help is also wise when the faucet body is cracked or replacement parts no longer fit. Persistent dripping can damage cabinets and encourage mold growth. Take a photo before disassembly. It helps identify the correct internal assembly. A repair may seem easy, but hidden corrosion can turn ten minutes into an afternoon.
: It often indicates a worn cartridge, O-ring, stem seal, or packing nut. The spout may not be the source.
Dry the faucet completely. Wrap a tissue around the handle base and body. Watch for the first dark spot.
Yes. Water can travel along the faucet stem. Check the highest wet point carefully.
Close both supply valves beneath the sink. Open the faucet briefly to release pressure. Keep a towel nearby.
Small screws and seals are easy to misplace. A photo shows the original order and position of each part.
A stiff, loose, gritty, or wobbling handle may indicate internal wear. Leaking during operation is another clue.
Yes. Deposits can roughen sealing surfaces and prevent a tight seal. Clean light buildup with a soft cloth.
Replace it when the leak source is visible and the faucet design is familiar. Use the old part for size comparison.
Call when the shutoff valve will not close, the handle is seized, or water leaks beneath the counter. A cracked body also needs professional assessment.
The valve body, seat, or housing may be cracked or corroded. My first diagnosis can be wrong. Do not force damaged parts.
A faucet dripping from the handle usually indicates that water is escaping from a worn, loose, or damaged internal component rather than from the spout itself. Common causes include a deteriorated cartridge, valve stem, O-ring, gasket, or packing nut. Mineral buildup, corrosion, and an improperly tightened handle can also allow water to collect around the handle and drip down the faucet body. Understanding what causes a faucet to drip from the handle makes it easier to locate the problem and choose the right repair.
Before beginning any work, turn off the water supply and dry the faucet completely. Then operate the handle, inspect the base and connections, and check whether the leak appears only when the faucet is running or also when it is turned off. Tightening a loose screw or nut may solve a minor issue, but damaged seals and cartridges usually need replacement. If the leak continues, the faucet is badly corroded, or the source is difficult to identify, calling a qualified plumber may prevent further water damage.

Flow Faucet