How to Tighten a Loose Kitchen Faucet Base China Best?

Time:2026-09-25 Author:Isabella
0%

A loose kitchen faucet base can turn an ordinary kitchen task into an annoying daily distraction. The faucet may shift when you move the handle, rinse a pan, or press the sprayer button. That movement can strain the water lines beneath the sink and allow moisture to collect around the mounting area. Small movement matters. This guide explains how to tighten a loose kitchen faucet base safely, while helping you identify when tightening alone may not solve the problem.

The right approach depends on the faucet’s design. Some models use a mounting nut beneath the sink; others have a bracket, screws, or a specialized tool. Before reaching into a cramped cabinet, clear out cleaning supplies and use a flashlight to locate the hardware. A helper can steady the faucet above while you check below. Avoid forcing a stuck nut or twisting the connected hoses. A towel under the fittings can catch drips and make leaks easier to spot. Take your time. The hardware may be awkward to reach, and a small adjustment is often enough. If the base still moves, inspect the mounting plate, sink surface, and fasteners for wear or corrosion. I would not assume every wobble has the same cause; faucet designs and installation conditions vary. A careful check can prevent needless parts replacement and help you decide whether a simple adjustment or professional repair is more appropriate.
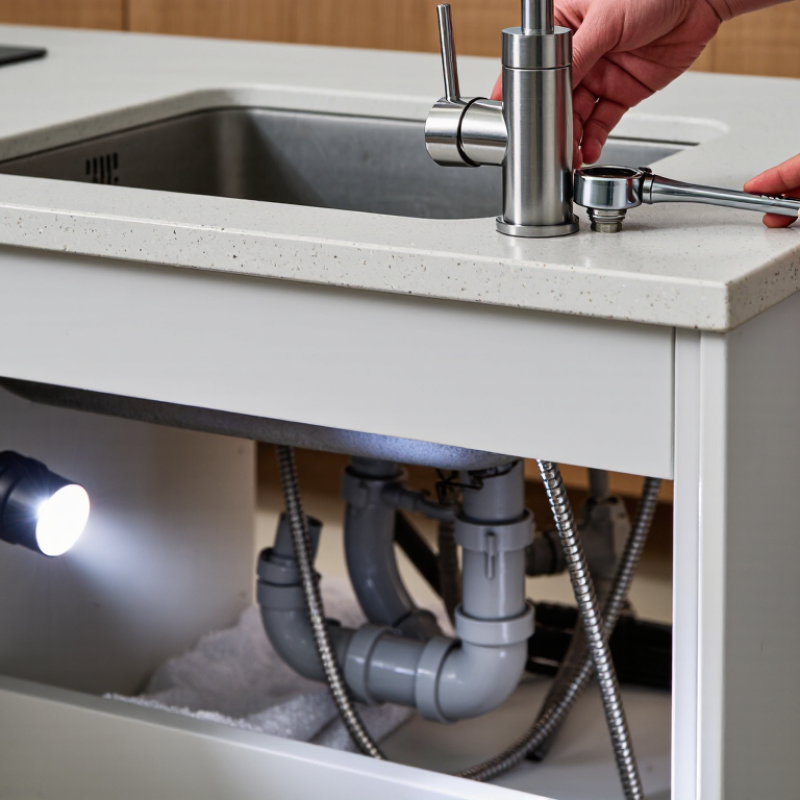
How to Tighten a Loose Kitchen Faucet Base China Best?

Identify the Faucet Type and Locate Its Mounting Hardware

Before tightening a loose kitchen faucet base, identify the faucet style from above the sink. A single-handle faucet usually has one central body; a two-handle model has separate hot and cold controls. Pull-down designs may also have a weighted hose beneath the basin. That hose weight is not mounting hardware. Look under the sink with a flashlight, and trace the faucet body to its threaded shank. You may find a large mounting nut, a horseshoe-shaped bracket, or several smaller nuts. The arrangement varies by model, so do not guess from the handle style alone.

A basin wrench can reach recessed nuts, while an adjustable wrench may work in open spaces. Turn off the hot and cold supply valves before putting tools near the connections. Tighten the mounting hardware gently and evenly; overtightening can damage threads or the sink surface. The awkward part is limited space. A mirror or phone photo can help you see whether the bracket is seated flat. The U.S. EPA WaterSense program estimates household leaks waste nearly 900 billion gallons of water annually. A loose base is not always a leak, but check the supply lines and cabinet floor for drips after tightening.

Tips: Keep a towel beneath the connections. Take a photo before moving anything. If the nut turns but the faucet still shifts, inspect the bracket and shank rather than forcing it. Stop if a supply line twists.

Clear the Cabinet and Shut Off the Water Supply

Before tightening a loose kitchen faucet base, empty the cabinet beneath the sink. Remove cleaners, bins, and anything that could block your reach. Place them on a towel nearby. A clear workspace helps you spot the shutoff valves and any existing leaks. Take a quick photo of the plumbing before moving hoses or supplies; it can help you put things back correctly. The cabinet may be cramped. Work slowly.

Find the hot and cold shutoff valves under the sink. Turn each valve clockwise by hand until it stops, without forcing it. Older valves can be stiff or corroded. If one resists, leaks, or feels likely to break, stop and seek help rather than gripping it with tools. Open the faucet handles to release pressure and check that the water has stopped. A small cup under the connections can catch a few remaining drops. Keep a flashlight and dry cloth within reach. Once the cabinet is empty and the supply is off, you can inspect the faucet mounting hardware with less risk of a surprise spray.

How to Tighten a Loose Kitchen Faucet Base China Best? - Clear the Cabinet and Shut Off the Water Supply

Step What to Do Useful Items Check Before Moving On
1. Clear the cabinet Remove stored items from beneath the sink so you can reach the faucet connections and mounting hardware. Flashlight, towel, small container Keep the work area dry and leave enough room to reach the shutoff valves.
2. Shut off the water Turn the hot- and cold-water shutoff valves beneath the sink clockwise until closed. If there are no working local valves, shut off the home’s main water supply. Shutoff valves; adjustable wrench if a valve handle requires one Open the faucet briefly to relieve pressure and confirm that water flow has stopped.
3. Locate the mounting hardware Look underneath the sink where the faucet shank passes through the sink or countertop. Identify the mounting nut or bracket securing the faucet. Flashlight, mirror Faucet designs vary; check the product instructions if the mounting arrangement is unclear.
4. Support and align the faucet From above the sink, center the faucet base and hold it steady while accessing the mounting hardware below. Helper, if available Make sure the faucet is aligned before tightening so it does not shift out of position.
5. Tighten the mounting hardware Use the appropriate tool to snug the mounting nut or bracket. Turn it gradually and stop when the base is secure. Basin wrench or the tool specified by the faucet instructions Avoid excessive force, which can damage mounting parts, the sink, or the countertop.
6. Restore water and inspect Open the shutoff valves slowly, then run the faucet and check the connections beneath the sink for leaks. Dry towel, flashlight Wipe the connections dry and check again after running the water. If a leak remains, shut off the water and investigate the connection.
Safety note: If a shutoff valve is stuck, leaking, or difficult to operate, do not force it. Faucet mounting methods differ, so follow the instructions for the specific faucet when available.

Access and Tighten the Faucet Mounting Nuts

Access and Tighten the Faucet Mounting Nuts

Clear the cabinet beneath the sink and place a towel under the connections. Shut off both supply valves, then open the faucet to release pressure. Use a flashlight to locate the mounting nuts beneath the sink deck. A basin wrench can help in tight spaces, but an adjustable wrench may work when access is clear. Awkward angles are common.

Ask someone to hold the faucet straight from above while you turn each nut from below. Tighten gradually, alternating between nuts if there are two. Stop when the base no longer shifts; excessive force can crack plastic hardware or damage the sink surface. Do not twist the supply hoses. If a nut is badly corroded or hidden behind the basin, pause and check the faucet’s installation instructions before forcing it.

After tightening, turn the valves back on and inspect the connections with a dry tissue. The U.S. Environmental Protection Agency’s WaterSense program estimates household leaks waste nearly 10,000 gallons of water per home each year. That figure covers many kinds of leaks, not loose faucet bases specifically, but it supports checking for drips during the repair. A little movement may remain if the sink deck itself flexes. That part deserves a closer look.

Inspect the Faucet Base, Sink, and Connections

A loose kitchen faucet can shift when you turn the handle, but the movement may come from a loose mounting nut, a damaged sink, or a failed seal. Clear the cabinet and use a flashlight to inspect beneath the faucet. Look for water trails, rust, swelling, or mineral deposits around the mounting hardware and supply connections. Check the sink surface, too; a cracked or flexing sink may prevent the base from staying secure. Look closely.

Dry the area, then run the faucet and watch each connection for fresh moisture. Check the hot and cold supply lines, shutoff valves, and the space directly under the faucet. The U.S. Environmental Protection Agency’s Fix a Leak Week guidance estimates that household leaks waste nearly 1 trillion gallons of water nationwide each year. That figure covers many kinds of leaks, not loose faucet bases alone, but it shows why a small drip deserves attention. A stain is not proof of a failed faucet; water can travel before it drips.

Tips: Take a photo before moving parts. If the sink is stable and the mounting hardware is accessible, tighten it gently with the correct tool. Avoid forcing corroded nuts. If the sink flexes, the leak continues, or you cannot identify the source, stop and consult a qualified plumber. A dry cabinet can still hide a slow leak.

Restore the Water Supply and Test for Movement or Leaks

After tightening a loose kitchen faucet base, reopen the shutoff valves slowly. Keep a towel beneath the sink and watch each supply connection as pressure returns. A sudden spray is uncommon, but a slow drip can be easy to miss. Turn the faucet on, run both hot and cold water for about a minute, then switch it off. Check the hoses, shutoff valves, and underside of the sink with a dry tissue. Damp spots show leaks more clearly than a quick glance. Go slowly.

Next, hold the faucet body and gently test for side-to-side movement. The base should feel firm, without shifting or clicking. Run the water again and inspect the base and counter edge for seepage. Leave the cabinet dry, then check it again after several minutes; a small leak may appear only after pressure builds. The U.S. Environmental Protection Agency’s WaterSense program estimates household leaks waste nearly 10,000 gallons of water per home each year. That figure covers many types of leaks, not faucets alone, but it shows why careful testing matters. If the faucet still moves, shut off the water before adjusting its mounting hardware. Recheck after tightening, since overtightening can damage parts or the sink surface.

FAQS

How can I tell what type of kitchen faucet I have?

A single-handle faucet has one central control. A two-handle faucet has separate hot and cold controls. Look underneath, too.

Where is the faucet’s mounting hardware?

Follow the faucet body beneath the sink to its threaded shank. You may find a large nut, a curved bracket, or several smaller nuts.

What tools might help tighten a loose faucet base?

A basin wrench can reach recessed nuts. An adjustable wrench may work where there is more room. Keep a flashlight nearby.

Should I shut off the water before tightening the faucet?

Yes. Turn off both supply valves before working near the connections. Place a towel underneath.

How tight should the mounting hardware be?

Tighten it gently and evenly. Too much force can damage threads or the sink surface. Stop if a supply line twists.

What should I check if the faucet still moves?

Inspect whether the bracket sits flat and the shank is secure. If the nut turns but the faucet shifts, forcing it may make things worse.

How can I check for a leak after tightening?

Dry the area, run the faucet, and watch the supply lines, shutoff valves, and space beneath the base for fresh moisture. Check again later.

What signs suggest the problem is not just a loose nut?

Look for rust, mineral deposits, water trails, or a cracked or flexing sink. A stain can be misleading; water may travel before it drips.

When should I stop and get help?

Stop if the sink flexes, a leak continues, or the hardware is corroded or unclear. I might miss a slow leak, even when the cabinet looks dry.

Conclusion

This guide explains how to tighten a loose kitchen faucet base safely and methodically. Begin by identifying the faucet style and finding the mounting hardware beneath the sink. Clear out the cabinet so you have room to work, then shut off the hot and cold water supply valves. If the valves are difficult to reach, use a light to inspect the area and keep a towel nearby to catch any drips.

Next, reach the mounting nuts and tighten them carefully with a suitable wrench or basin tool. Avoid overtightening, which can damage the faucet, sink, or fittings. Inspect the faucet base, the sink surface, and nearby connections for signs of wear, corrosion, or leaks. Once everything is secure, turn the water supply back on and test the faucet. Check for movement at the base and watch the connections for leaks, tightening or repairing any problem that remains.

Isabella

Isabella

Isabella is a dedicated marketing professional with a sharp focus on driving brand growth and engagement through strategic content creation. With an extensive background in digital marketing, she combines her passion for storytelling with her keen understanding of industry trends to deliver......