Top 10 Ways to Fix a Leaking Basin Faucet Easily?

Time:2026-04-14 Author:Mason
0%

Dealing with a leaking basin faucet can be frustrating. It not only wastes water but can also lead to costly repairs. John Smith, a plumbing expert with over a decade of experience, emphasizes, “Understanding how to fix a leaking basin faucet can save you time and money.” His insight reflects the importance of tackling this common issue promptly.

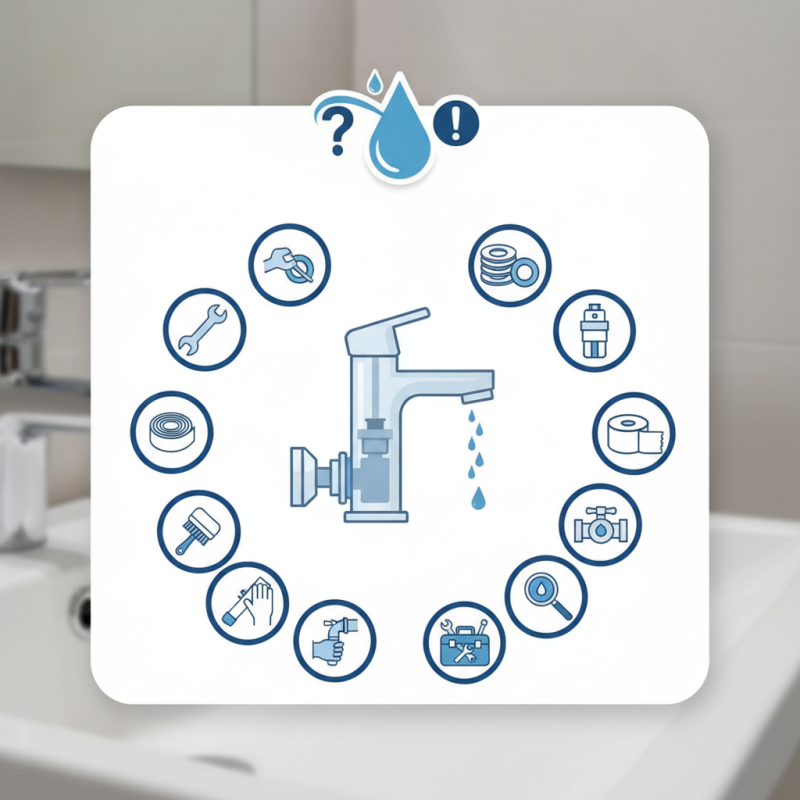
When attempting to fix such leaks, having the right tools and knowledge is essential. Simple tasks like replacing washers, O-rings, or even tightening connections can often solve the problem. However, many homeowners might overlook these basic steps. Learning how to fix a leaking basin faucet involves understanding the faucet's anatomy and assessing what parts are malfunctioning.

Even seasoned DIYers can make mistakes or misjudge the severity of a leak. A small oversight can lead to more significant issues later. It's crucial to take the time to evaluate the situation before rushing to fix the leak. This approach ensures that you address the root cause rather than just the symptoms.

Top 10 Ways to Fix a Leaking Basin Faucet Easily?

Understanding the Common Causes of Basin Faucet Leaks

Basin faucet leaks are a common household issue, often due to wear and tear. A report from the American Leak Detection indicates that household leaks waste about 1 trillion gallons of water annually. This staggering figure highlights the urgency of addressing leaks promptly.

One major cause of leaks is a faulty washer. Over time, the rubber can degrade, creating gaps for water to escape. Corroded valves can also lead to inefficiencies. The National Association of Plumbing Contractors found that more than 40% of faucet leaks stem from these simple issues. Even minor corrosion can worsen over time, increasing the leak's severity.

Another issue is improper installation. According to the Plumbing-Heating-Cooling Contractors Association, nearly 25% of leaks result from poorly fitted faucets. Many homeowners overlook this detail, leading to costly repairs. Regular inspections can catch these early, saving water and money. Addressing both minor wear and installation errors head-on is essential.

Top 10 Ways to Fix a Leaking Basin Faucet Easily

Method Common Causes Difficulty Level Estimated Time Tools Needed
Tighten Faucet Handles Worn washer Easy 5 minutes Screwdriver
Replace the O-ring O-ring worn out Moderate 15 minutes Wrench, replacement O-ring
Change the Washer Worn washer Moderate 20 minutes Wrench, new washer
Check the Cartridge Cartridge deterioration Hard 30 minutes Cartridge puller, new cartridge
Inspect Pipe Connections Loose connections Moderate 10 minutes Wrench
Seal Leaks with Tape Cracked threads Easy 5 minutes Plumber's tape
Install a New Faucet Old faucet Hard 1 hour New faucet, tools
Clean Aerator Clogging debris Easy 10 minutes Sponge, water
Replace Drain Assembly Faulty drain Moderate 25 minutes New drain assembly
Use Plumber's Sealant Gaps in fittings Moderate 30 minutes Sealant

Essential Tools and Materials for Faucet Repair

When tackling a leaking basin faucet, having the right tools is crucial. A basic toolkit should include an adjustable wrench, screwdrivers, and pliers. Also, a basin wrench can access hard-to-reach bolts. Rubber gloves will protect your hands. Don’t forget a bucket to catch any water.

While gathering materials, consider replacement parts like washers and O-rings. Ensure they fit your faucet model. A sealant may also be needed to address any gaps. Not having the correct size can lead to continued leaks.

Here’s a tip: Before starting any repairs, turn off the water supply. Test the faucet to ensure it’s fully off. This step prevents mess and potential water damage. Be mindful; you may face unexpected challenges, like rusted parts. Patience and careful inspection of the faucet can lead to better repair outcomes.

Step-by-Step Guide to Disassembling a Leaking Faucet

When dealing with a leaking basin faucet, disassembly is the crucial first step. Begin by turning off the water supply beneath the sink. Ensure to have a towel handy. Water may spill out during disassembly, so be prepared and protect your area.

Use a wrench to carefully remove the faucet handle. Inspect the handle closely for wear or damage, which could cause leaks.

Next, take out the packing nut using pliers. Often, this part is tight and can be tricky to remove. After disassembling, clean each component with a cloth. Pay special attention to seals and O-rings; they may need replacing. Look for cracks or signs of wear. These tiny details can lead to big problems. Sometimes, the issue lies in a faulty cartridge or valve. Thoroughly examine these parts as well. Each step matters. A well-executed disassembly could save you time and money.

How to Replace Washers and O-Rings for a Leak-Free Faucet

Dealing with a leaking basin faucet can be frustrating. However, replacing washers and O-rings is a straightforward solution. Over time, these components wear out due to constant exposure to water. Replacing them can restore your faucet's functionality and prevent water waste.

Start by shutting off the water supply. Take off the faucet handle to access the internal components. Remove the old washer or O-ring carefully. Check for any signs of damage, like cracks or deformities. A fitted replacement will ensure a proper seal, preventing leaks.

Tip: Always take the old parts to a hardware store. This can help you find an exact match. It saves time and avoids frustration.

After installation, test the faucet by turning on the water supply slowly. Check for leaks. If water still drips, there might be an underlying issue. Sometimes, other components may need inspection.

Tip: Document any observations during your repair. Noting down what worked and what didn't can guide future troubleshooting. It’s a learning process. Each attempt improves your skills over time. Fixing a faucet isn't just a task; it’s a way to enhance your home maintenance expertise.

Tips for Reassembling Your Faucet and Testing for Leaks

Reassembling your basin faucet after fixing a leak is a critical step. Proper reassembly ensures that no parts are misplaced and that the faucet will function correctly. Studies from plumbing industries show that nearly 25% of plumbing issues stem from improper reassembly. Before starting, lay out all parts clearly. Ensure that each component is clean and free from debris.

Once reassembled, testing for leaks is essential. Turn the water supply back on slowly. Monitor for any drips or moisture around the faucet. According to a report by the American Society of Plumbing Engineers, 30% of leaks occur within the first few hours of reassembly. It's advisable to check connections several times. Do not overlook small leaks; they can lead to larger issues over time.

Pay attention to the materials used during reassembly. Using compatible sealing washers and O-rings is crucial. A common mistake is assuming all parts are the same regardless of model or design. These small differences can lead to significant leaks. Take the time to inspect each component. A meticulous approach will save you time and money in the long run.

FAQS

: What causes basin faucet leaks?

: Common causes include worn washers, corroded valves, and improper installation.

How can worn washers create leaks?

Worn washers can degrade and develop gaps, allowing water to escape uncontrollably.

What percentage of faucet leaks are installation-related?

Nearly 25% of leaks stem from poorly fitted faucets, often overlooked by homeowners.

What tools do I need for faucet repair?

You’ll need an adjustable wrench, screwdrivers, pliers, a basin wrench, rubber gloves, and a bucket.

Why is it important to turn off the water supply before repairs?

Turning off the water prevents mess and potential water damage during the repair process.

How do I replace washers and O-rings?

Shut off the water, remove the faucet handle, replace the worn parts, and ensure a proper fit.

What should I do if leaks persist after repairs?

If leaks continue, there may be other underlying issues to inspect or repair.

How can I ensure I get the right replacement parts?

Always take old parts to a hardware store for an exact match to avoid future issues.

What is an effective tip for documenting repairs?

Note observations on what worked or didn’t. This can help with future troubleshooting.

How do these repairs enhance my skills?

Each repair deepens your understanding. It’s a learning process that improves home maintenance skills.

Conclusion

This article provides a comprehensive guide on how to fix a leaking basin faucet efficiently. It begins by examining the common causes of leaks, which often stem from worn-out washers, O-rings, or even corroded parts. By understanding these issues, homeowners can better prepare for the repair process. Essential tools and materials necessary to carry out the fix are also highlighted, ensuring that you are well-equipped before beginning the task.

Following this, the article offers a step-by-step guide to disassembling the leaking faucet, replacing washers and O-rings, and tips for reassembling the faucet correctly. It emphasizes the importance of careful assembly to prevent future leaks, concluding with advice on testing for leaks after the repair is complete. This structured approach simplifies the process of learning how to fix a leaking basin faucet, making it accessible for DIY enthusiasts and homeowners alike.

Mason

Mason

Mason is a seasoned marketing professional with a deep expertise in the company's offerings and a passion for driving brand awareness. With a strong background in digital marketing strategies, he has an innate ability to connect with diverse audiences and effectively communicate product benefits.......