7 Best Ways to Upgrade a Shower System Without Breaking Tiles

Time:2026-11-09 Author:Mason
0%

A dated shower can make the whole bathroom feel worn, even when the tiles are still in good condition. Replacing the shower system does not always require demolition. With the right parts and a careful plan, you may be able to refresh the visible fixtures while keeping the existing tile intact. Good news: less mess.

This guide explains how to upgrade a shower system without breaking tiles through seven practical approaches, from changing the showerhead and trim to considering a compatible handheld sprayer or pressure-balancing valve. Each option depends on what sits behind the wall. A shiny new fixture cannot fix a leaking pipe, and not every valve works with every trim kit. Check the manufacturer’s compatibility details before you buy. Measure the shower arm, inspect exposed connections, and turn off the water before starting any work.

Small details matter. A worn gasket, mineral buildup, or a stubborn connection can complicate an otherwise simple swap. If you notice damp drywall, corrosion, or a valve that requires access behind the tile, pause and consult a qualified plumber. That can feel like a setback, but it may prevent a much larger repair. The following ideas help you compare upgrade options, understand their limits, and choose changes suited to your shower—not just the product photos.
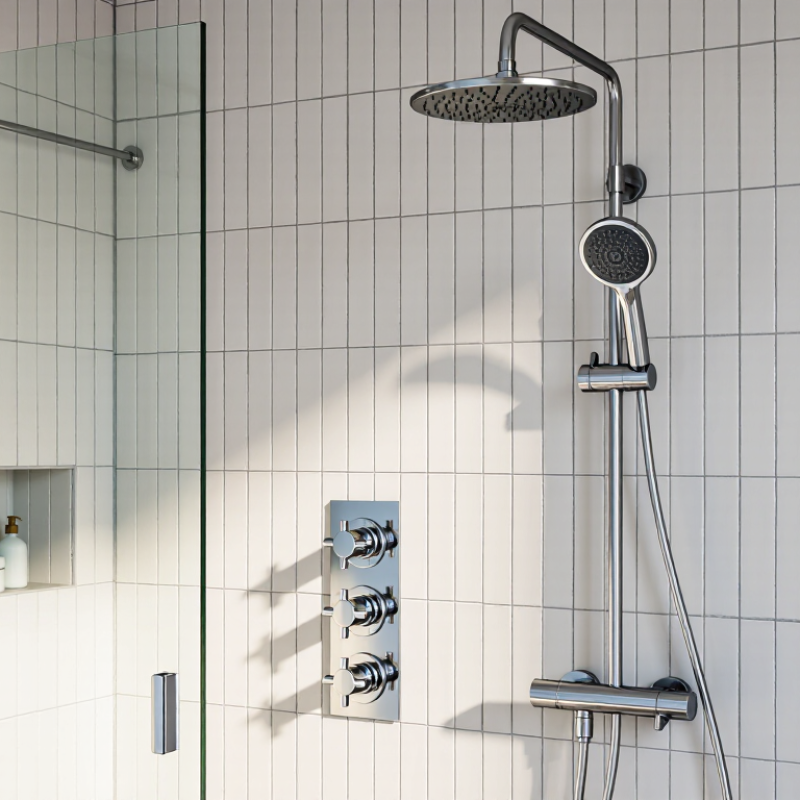
7 Best Ways to Upgrade a Shower System Without Breaking Tiles

Assess the Existing Shower and Plan Tile-Safe Upgrades

Before choosing a new showerhead or hand shower, inspect what is already installed. Note the valve type, pipe locations, showerhead height, and any existing diverter. A photo of the plumbing and trim can help a plumber check compatibility without opening the wall. Look for loose grout, cracked tiles, soft spots, or staining nearby. These may point to moisture problems that need attention before cosmetic upgrades.

Check water pressure and flow at the shower, since a new fixture cannot fix every plumbing limitation. If the current valve works well, replacing compatible trim may refresh the appearance while keeping the tiled wall intact. Some systems still require access from behind the wall, however. Don’t assume.

Measure carefully. A handheld shower, slide bar, or added outlet may need existing connections or a suitable access route. Mark tile joints and nearby studs before planning any drilling; even a small hole can crack tile if the surface is unsupported or the bit wanders. Use tile-rated tools and appropriate anchors, or ask an experienced installer to assess the wall. I once overlooked a narrow grout joint during planning; the proposed placement looked fine on paper, but the hardware would have crowded the corner. Small details matter. Keep notes on measurements, valve operation, and visible wear before requesting an estimate.

Replace the Showerhead or Add a Handheld Spray

Replacing a showerhead is one of the simplest upgrades that leaves tile untouched. Turn off the shower valve, then unscrew the old head by hand or with a cloth-wrapped wrench. The cloth helps prevent scratches on the metal arm. Check the threads for rust or mineral buildup before attaching a new head. A small amount of plumber’s tape can help seal clean, compatible threads, but it cannot fix a damaged fitting.

Want more flexibility? Add a handheld spray using a diverter that connects at the shower arm or replaces the existing showerhead. Check the connection size and available clearance first; some older arms have unusual fittings or sit close to a wall. Tighten connections gently. Too much force can damage threads hidden behind the tile. Not a great surprise.

After installation, run the water and inspect each joint with a dry paper towel. Even a slow drip leaves a clear mark. If water appears where the arm enters the wall, stop and investigate rather than tightening blindly. That part may need professional attention. Also consider hose length: it should reach the tub or shower floor without pulling sharply at the connection. A minor detail, but an awkward hose can make a polished upgrade feel unfinished.

Refresh Visible Fixtures and Control Trim

Refresh the shower’s visible fixtures before considering demolition. A new showerhead, arm, escutcheon, and handle can change the room’s look while leaving tile intact. EPA WaterSense estimates that replacing a standard showerhead with a certified model can save an average family 2,700 gallons of water each year. These models use no more than 2.0 gallons per minute, compared with the federal standard of 2.5. No tile demolition. Check the existing valve first: trim kits are not universally compatible, even when they look similar.

Control trim matters as much as finish. A larger plate can cover old marks, while a clear temperature indicator makes daily adjustments easier. Take photos before disassembly, note the valve manufacturer and model if available, and measure the plate and handle. EPA’s WaterSense showerhead guidance is useful for comparing flow rates, but it does not confirm trim compatibility. That part can be frustrating. If the valve is worn or unidentified, ask a licensed plumbing professional before ordering parts; forcing a mismatched handle can damage the valve.

Tip: Shut off the water, protect the tub with a towel, and keep small screws in a cup. Test the handle and check for drips before sealing the escutcheon. A neat finish is satisfying, but sealing too early can hide a leak.

7 Best Ways to Upgrade a Shower System Without Breaking Tiles — Refresh Visible Fixtures and Control Trim
Upgrade What It Refreshes Tile Impact Compatibility and Practical Notes Typical DIY Time
Replace the showerhead Updates the spray pattern and appearance of the main shower outlet. Usually none; the head normally unscrews from the existing shower arm. Check the connection size and follow the manufacturer’s installation instructions. Clean old thread sealant from the connection and check for leaks after installation. About 15–30 minutes
Add a handheld showerhead Adds a detachable spray for rinsing, cleaning, and seated use. Usually none when installed with a shower-arm diverter or another compatible existing outlet. Confirm that the diverter and hose fit the existing plumbing. Added fittings can reduce flow, and a handheld unit should be secured in its holder when not in use. About 30–60 minutes
Replace the shower arm and flange Refreshes the visible pipe and wall trim around the showerhead. Usually none if the existing wall connection is sound and the arm can be unscrewed without turning the fitting behind the wall. Use a correctly sized replacement and avoid twisting or stressing the concealed pipe. Stop if the wall fitting moves or leaks. About 30–60 minutes
Change the handle and escutcheon trim Updates the visible shower control handle and wall plate. Often none when the new trim is designed for the existing valve. Trim is not universally interchangeable. Match it to the valve type and model; changing the concealed valve itself may require access behind the wall or tile removal. About 30–90 minutes
Replace a tub spout or diverter Refreshes the spout and, on some tub-shower setups, the control that directs water to the showerhead. Usually none if the replacement suits the existing pipe connection. Determine whether the spout connects by a threaded fitting or a slip connection before buying parts. A leaking or damaged pipe may need additional repair. About 30–90 minutes
Renew the shower-door seals and hardware Improves the appearance of the enclosure and can help reduce water escaping through door gaps. Usually none; seals and many handles attach to the door or frame. Measure the glass thickness and seal profile before ordering. Keep the shower door supported while replacing hardware, and use only compatible parts for the enclosure. About 30–90 minutes
Refresh silicone caulk and localized grout Renews the finish at corners, joints, and other worn areas around the shower. No tile removal is needed for routine surface repair. Remove failed sealant before applying new bathroom-grade silicone to movement joints. Grout and silicone serve different purposes; do not apply rigid grout in flexible corners. About 1–3 hours, plus curing time

Before starting: Check for leaks and confirm compatibility before removing any parts. Turn off water when the work requires it, follow product instructions, and contact a qualified plumber if a concealed valve, pipe, or wall connection is damaged.

Add a Rainfall Head or Diverter to Existing Connections

A rainfall head can often be added to an existing shower arm, leaving the tile untouched. Turn off the water, then unscrew the old head with a cloth-wrapped wrench to protect the finish. Check the arm for rust, damaged threads, or movement before fitting anything new. A loose arm needs attention; do not hide it behind a larger showerhead.

Fit a compatible diverter if you want to switch between the existing head and a rainfall head. Some diverters attach at the shower arm, while others replace the tub spout, so check the connection type before buying. Wrap the threads with fresh plumber’s tape and tighten by hand first. Keep it snug, not forced. Attach the new head, turn on the water, and watch each joint for drips while testing both settings. A bucket can help you compare spray strength; adding another outlet may reduce pressure. If the arm is corroded, the connections leak inside the wall, or the parts do not align, stop and ask a qualified plumber rather than forcing a fit.

7 Best Ways to Upgrade a Shower System Without Breaking Tiles

Add a rainfall head or diverter to existing connections. Compare showerhead flow-rate limits before choosing a replacement.

A showerhead swap can use the existing shower arm, avoiding tile removal. The U.S. federal limit is 2.5 gallons per minute (gpm); WaterSense-labeled showerheads are limited to 2.0 gpm at 80 psi. A diverter can redirect water between outlets, but check the product specifications for its flow rate and connection requirements.

Sources: U.S. EPA WaterSense showerhead specifications · U.S. Department of Energy appliance standards

Upgrade Storage, Lighting, and Water Efficiency Without Demolition

Add storage without opening the wall. A shower caddy that hangs from the showerhead can hold shampoo and soap, while adhesive baskets suit smooth, nonporous surfaces. Clean and dry the tile before applying them, then respect the stated weight limit. They can loosen over time. Check them regularly.

Better lighting can make a shower feel more usable, especially in a dim corner. Choose a fixture specifically rated for its intended bathroom location, and have a qualified electrician handle wiring changes. For a simpler upgrade, improve the room’s existing lighting rather than adding a light inside the shower. Small change, noticeable difference.

Water efficiency often starts at the showerhead. A compatible, low-flow model may reduce water use while keeping a comfortable spray; check its flow rate and your home’s water pressure before buying. After installation, run the shower and inspect the connection for drips. A slow leak is easy to overlook. If the fitting is corroded, unusually tight, or leaks after careful installation, stop and ask a plumber rather than forcing it. These upgrades avoid tile demolition, but not every bathroom has compatible fittings or suitable surfaces. Measure first; that small step can prevent a frustrating return.

FAQS

What should I inspect before upgrading a shower?

Check the valve, pipe locations, showerhead height, and any diverter. Look for cracked tile, loose grout, soft spots, or nearby stains. Take a photo for a plumber.

Can I replace a showerhead without damaging the tile?

Usually, yes. Turn off the shower valve and loosen the old head carefully. Wrap a cloth around the wrench to protect the metal arm.

How can I check for leaks after installing a showerhead?

Run the water and press a dry paper towel against each connection. Watch for damp spots. A slow drip still matters.

Can I add a handheld shower without opening the wall?

A diverter at the shower arm may work if the fittings are compatible. Check the connection size and clearance near the wall before buying.

What should I do if a connection leaks near the wall?

Stop and investigate. Don’t keep tightening it blindly; the fitting may need professional attention.

How can I add shower storage without drilling into tile?

Try a showerhead-hanging caddy or adhesive baskets on smooth, nonporous tile. Clean and dry the surface, then check the weight limit regularly.

Can a low-flow showerhead reduce water use?

A compatible low-flow model may help while maintaining a comfortable spray. Check its flow rate and your home’s water pressure first.

What should I consider before drilling for a slide bar?

Mark tile joints and nearby studs. Use tile-rated tools and suitable anchors, or ask an experienced installer. I once missed a narrow grout joint; the planned hardware crowded the corner. A small detail, but easy to overlook.

Conclusion

Upgrading a shower does not have to mean removing tiles or starting a major renovation. Begin by checking the existing plumbing, water pressure, shower connections, and condition of the surrounding surfaces. With those details in mind, you can choose compatible improvements that work with what is already in place.

Simple changes can make a shower feel more comfortable and functional: replace the showerhead, add a handheld spray, or refresh visible fixtures and control trim. If the existing connections allow it, a diverter can support a rainfall head or another spray option. You can also improve storage, lighting, and water efficiency with additions that avoid disturbing the tiled walls. A thoughtful plan for how to upgrade a shower system without breaking tiles helps create a refreshed space while keeping the project manageable.

Mason

Mason

Mason is a seasoned marketing professional with a deep expertise in the company's offerings and a passion for driving brand awareness. With a strong background in digital marketing strategies, he has an innate ability to connect with diverse audiences and effectively communicate product benefits.......